Import Guide
NWH Vehicle Physics 2 aims to automate import process as much as possible but some actions can not be performed from scripting and so these have to be done manually.
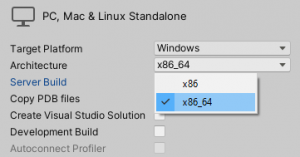
- If the build target is
Windows / x86make sure to change it toWindows / x86_64or Unity InputSystem will not work. This can be done under File ⇒ Build Settings. InputSystem is required for demo scenes.
- A popup asking about package dependencies will pop up. Click Install/Upgrade.
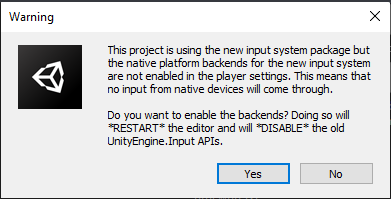
- Another message will pop up after InputSystem package is done installing about disabling the old InputManager. Click No:
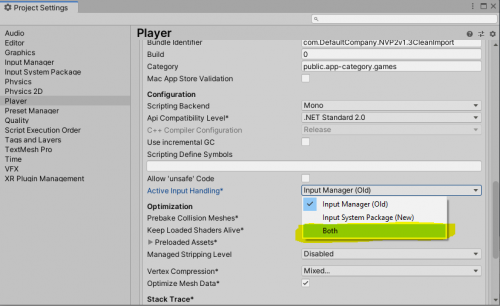
- Afterwards, go to project settings and change Project Settings ⇒ Player ⇒ Active Input Handling to
Both. This way both Unity InputSystem and the old Unity InputManager will work (NVP2 supports both).
- Ignore any mesh or tree related messages that pop up in the console. These are only import related and will not show up again.
- Open the demo scene to test the import. Demo scene can be found under NWH Vehicle Physics 2 ⇒ _Demo ⇒ _Scenes ⇒ _Racetrack. The scene should work out of the box. If it does not or if you encountered any issues during import please contact the developer.
- To make the demo scene look better switch the color space of the project to
Linearunder Project Settings ⇒ Player ⇒ Color Space.
Assembly Definitions
This asset uses Assembly Definition (.asmdef) files.
- If the project already uses assembly definitions accessing a script that belongs to this asset can be done by adding an assembly reference to the assembly definition of the script that needs asset. E.g. to access
VehicleControlleradding aNWH.VehiclePhysics2.VehicleControllerreference toMyProject.asmdefis required.
- If the project does not use assembly definitions remove all the
.asmdeffiles from the asset after import (not recommended!).


